
The Hidden Costs of Ignoring That Dripping Toilet
That persistent drip, drip, drip from your toilet can be more than just a minor irritation. It can represent a significant, ongoing drain on your resources. Ignoring a leaking toilet often leads to substantial financial and environmental consequences that accumulate surprisingly quickly. Addressing the issue promptly is essential for both your budget and the planet. While this article focuses on toilets, similar problems can arise from other fixtures; learn more about addressing a dripping faucet.
The Financial Drain: More Than Just Water Down the Drain
The most immediate consequence of a toilet leak is a higher water bill. Even a seemingly small leak can waste a surprising amount of water. A slow leak, for instance, could easily waste 10 gallons of water per day. Over a month, this adds up to 300 gallons. This can translate to a noticeable increase in your water bill, particularly in areas with higher water costs. Beyond the immediate impact on your water bill, ignoring a leak can lead to more substantial expenses later. Prolonged water exposure can damage flooring, walls, and even the toilet itself, requiring costly repairs or replacements.
The Environmental Impact: A Ripple Effect
The financial burden isn't the only concern. A constantly running toilet contributes to water waste, an increasingly pressing environmental issue. Freshwater resources are finite, and needless waste through leaks strains our water supply, particularly in drought-prone areas. The energy consumed to treat and deliver water is also wasted when leaks occur. This waste has a real impact on a global scale. In the UK, for example, it's estimated that 5 to 8% of toilets leak, wasting between 215 to 400 litres of water per leaking toilet daily. Across the UK, this translates to approximately 400 million litres lost daily, impacting water resources and household expenses alike. More detailed statistics on the impact of leaking toilets can be found here.
Different Leaks, Different Consequences
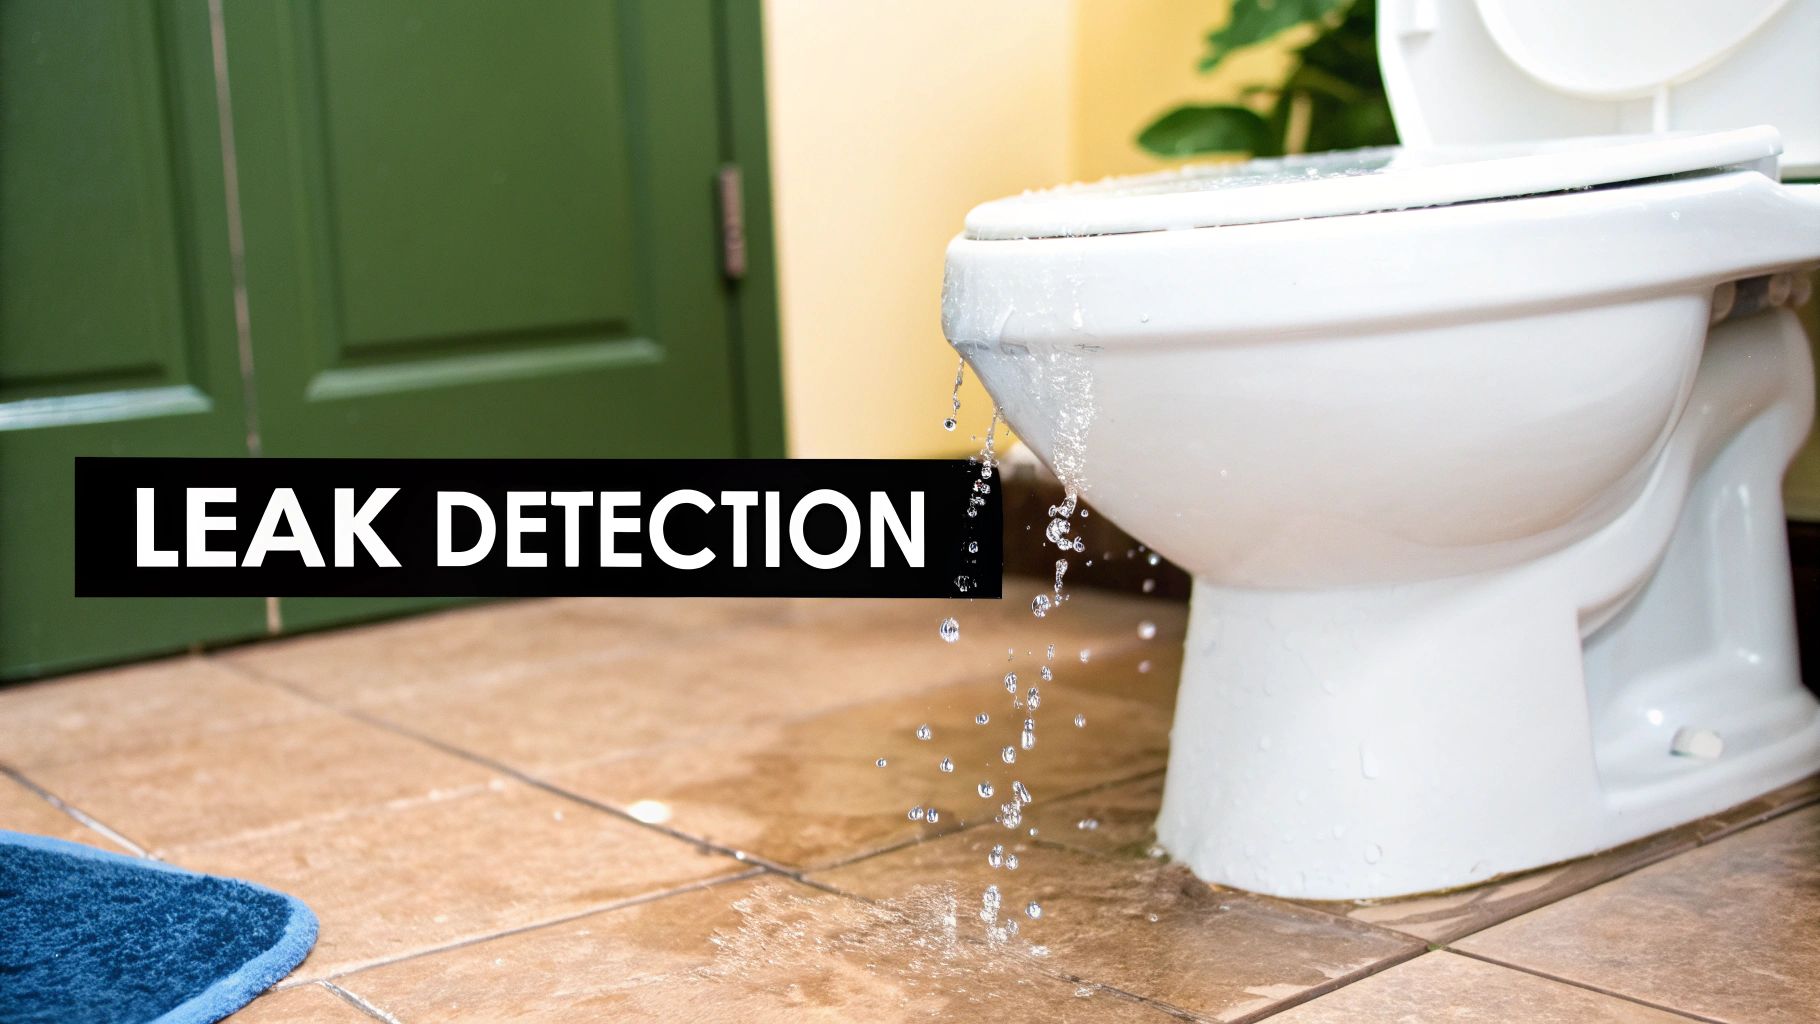
The severity of the impact depends on the specific type of leak. A slow, silent leak from the tank, for example, can go undetected for months, silently driving up your water bill. In contrast, a leak from the toilet's base can quickly cause significant water damage to your bathroom floor and the underlying subfloor. This often necessitates extensive and often expensive repairs. A constantly running toilet, though often more noticeable due to the sound of running water, is equally wasteful if ignored. Recognizing these different types of leaks highlights the importance of regular checks and prompt repairs to prevent costly and environmentally damaging consequences.
Tracking Down Your Toilet Leak: Detective Work That Pays Off
Before reaching for your tools, take a moment to investigate. Identifying the source of your toilet leak is the first step to a successful repair. Pinpointing the issue saves you time and money, ensuring you address the correct problem immediately. This focused approach streamlines the entire repair process.
Is It a Leak or Just Condensation?
Condensation on the toilet tank is often mistaken for a leak. This "sweating" occurs due to temperature differences between the water inside and the air outside. It's a natural occurrence, especially in humid climates. A true leak, however, involves water escaping the plumbing system. Recognizing the difference prevents unnecessary work. Dry the tank completely. If moisture returns quickly and consistently in one spot, it's likely a leak.
The Food Coloring Test: Revealing Hidden Leaks
The food coloring test is a simple yet effective leak detection method, especially helpful for finding silent leaks from the tank to the bowl. Add a few drops of food coloring to the tank and observe. If the color appears in the bowl without flushing, you have a tank leak. This easy technique identifies leaks you might otherwise miss.
Listen Closely: Sound-Based Troubleshooting
Sound is another diagnostic tool. A constantly running toilet clearly indicates a problem. However, even subtle sounds can be helpful. A hissing sound often signifies a fill valve issue, while a trickling sound might point to a flapper problem. Understanding these auditory cues can help pinpoint the leak source.
Common Leak Locations and Their Telltale Signs
Leaks typically occur in specific areas, each with its own symptoms. Knowing these patterns narrows your search. For instance, water around the toilet's base suggests a base leak, whereas a consistently low water level in the tank indicates a tank leak.
To further aid in your detective work, the following table provides a helpful overview:
Common Toilet Leak Locations and Symptoms
This table helps identify different types of toilet leaks based on observable symptoms and their likely causes.
| Leak Location | Symptoms | Likely Cause | Difficulty to Fix |
|---|---|---|---|
| Tank to Bowl | Silent leak, running water sound | Faulty flapper, fill valve issues | Easy to Moderate |
| Base of Toilet | Water pooling around the base | Wax ring failure, cracked porcelain | Moderate to Difficult |
| Supply Line | Water around the tank, behind the toilet | Loose connection, cracked supply line | Easy to Moderate |
Identifying the exact leak location significantly reduces repair time. Accurately diagnosing the issue also ensures you purchase only the necessary parts, saving money. A single leaking toilet can waste approximately 178 litres of water per hour, totaling about 1.6 million litres annually. This increases utility bills and strains water resources, making prompt detection and repair essential. Learn more about the impact of leaking toilets here. These leaks can represent a substantial portion of total water usage in commercial buildings, highlighting the need for regular monitoring and maintenance. Taking the time to thoroughly investigate your leak pays off in efficiency and effectiveness.
Tools of the Trade: Setting Yourself Up for Success
Having the right tools is essential for efficiently fixing a leaking toilet. A well-stocked toolkit can transform a potentially frustrating plumbing problem into a manageable DIY project. This section will guide you through assembling the necessary tools, ensuring a smooth and successful repair.
Essential Tools for Toilet Repair
While standard wrenches and pliers are helpful, certain specific tools can greatly simplify toilet repairs. These specialized tools, often preferred by professional plumbers, improve efficiency and help prevent costly mistakes.
- Adjustable Wrench: This is crucial for loosening and tightening various nuts and bolts found on your toilet.
- Tongue-and-Groove Pliers: These pliers provide a firm grip on pipes and fittings, preventing slippage during adjustments. This extra grip is invaluable when working in tight spaces.
- Screwdrivers: Keep both Phillips and flathead screwdrivers on hand. You'll need them for tasks such as removing the toilet seat or adjusting internal components.
- Plunger: A plunger is helpful for clearing clogs that may be contributing to or worsening the leak. Addressing a clog can sometimes solve the problem entirely.
- Bucket: A bucket is essential for collecting water drained from the tank and bowl during the repair. This keeps your work area contained and prevents a bigger mess.
- Sponge: Use a sponge to absorb excess water and maintain a clean work area.
- Old Towels: These protect your bathroom floor and provide cushioning for the toilet tank lid when you remove it.
- Toilet Repair Kit: A pre-assembled toilet repair kit often includes common replacement parts like a flapper, fill valve, and tank bolts, streamlining the repair process.
Quality Parts vs. Budget Options: Choosing Wisely
Understanding which replacement parts require higher quality and where budget-friendly options are acceptable can save you money. For instance, investing in a durable fill valve is a good idea for long-term reliability. However, a less expensive flapper can often be just as effective.
Prioritizing Safety First
Preventing water damage and personal injury is paramount during any plumbing work. Taking the right safety precautions is vital.
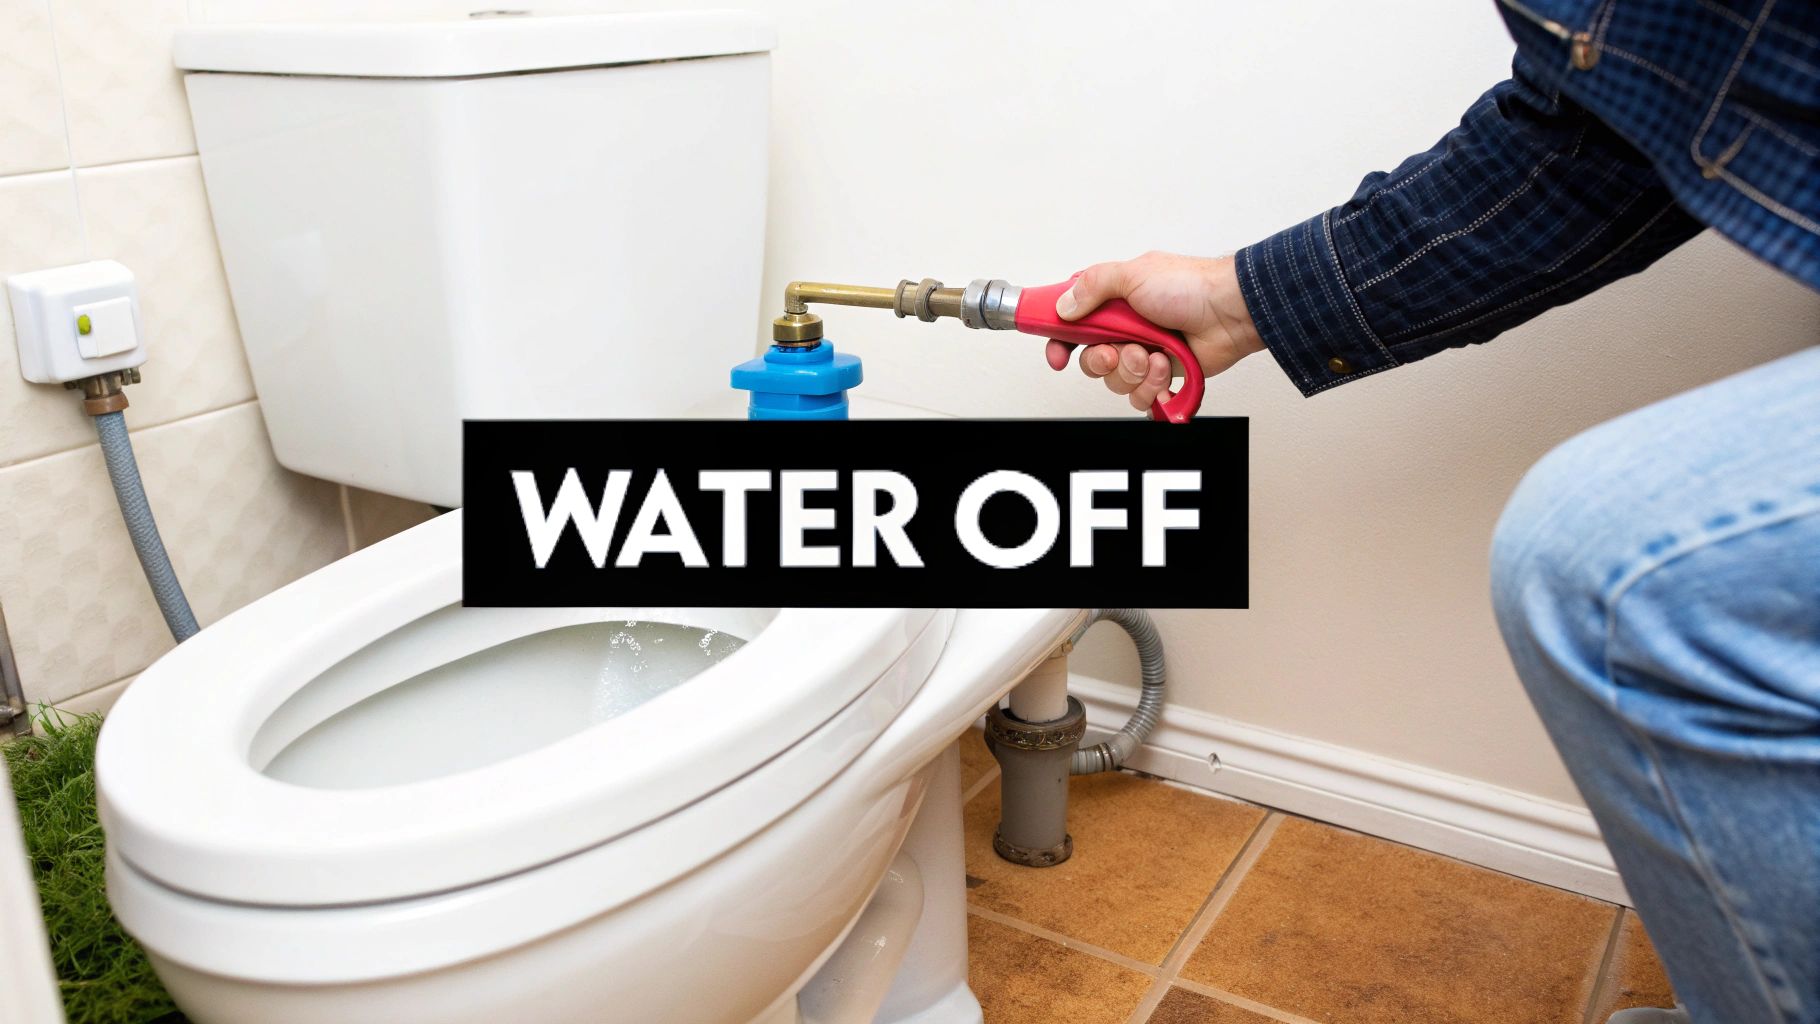
- Turning Off the Water Supply: Before starting any repair, locate the shutoff valve behind the toilet and turn it clockwise to stop the water flow.
- Wearing Gloves: Protect your hands from germs and potential irritants in the toilet water by wearing gloves.
- Eye Protection: Wear eye protection to shield your eyes from splashing water or debris.
Preparing your workspace can further minimize cleanup and protect your bathroom. Laying down towels or a drop cloth, for example, safeguards the floor from spills. Taking these steps beforehand simplifies the entire process and ensures a cleaner, safer repair.
Fix Leaking Toilet Problems: Your Step-by-Step Roadmap
A leaking toilet can be a frustrating and costly problem. This guide provides a step-by-step approach to the most common toilet leak repairs, helping you address the issue effectively.
Replacing a Faulty Flapper: A Common Culprit
The flapper is a rubber seal at the bottom of the tank. It controls the flow of water into the bowl and is a frequent source of leaks. Fortunately, replacing it is relatively simple.
-
Turn Off the Water Supply: Locate the shutoff valve behind the toilet and turn it clockwise.
-
Flush the Toilet: This empties the tank, giving you a dry workspace.
-
Detach the Chain: Disconnect the chain linking the flapper to the trip lever.
-
Remove the Old Flapper: Pull the old flapper off the pegs.
-
Install the New Flapper: Attach the new flapper to the pegs, ensuring a snug fit.
-
Reconnect the Chain: Adjust the chain's length; it shouldn't be too loose or tight.
-
Turn the Water Supply Back On: Slowly turn the valve counter-clockwise.
-
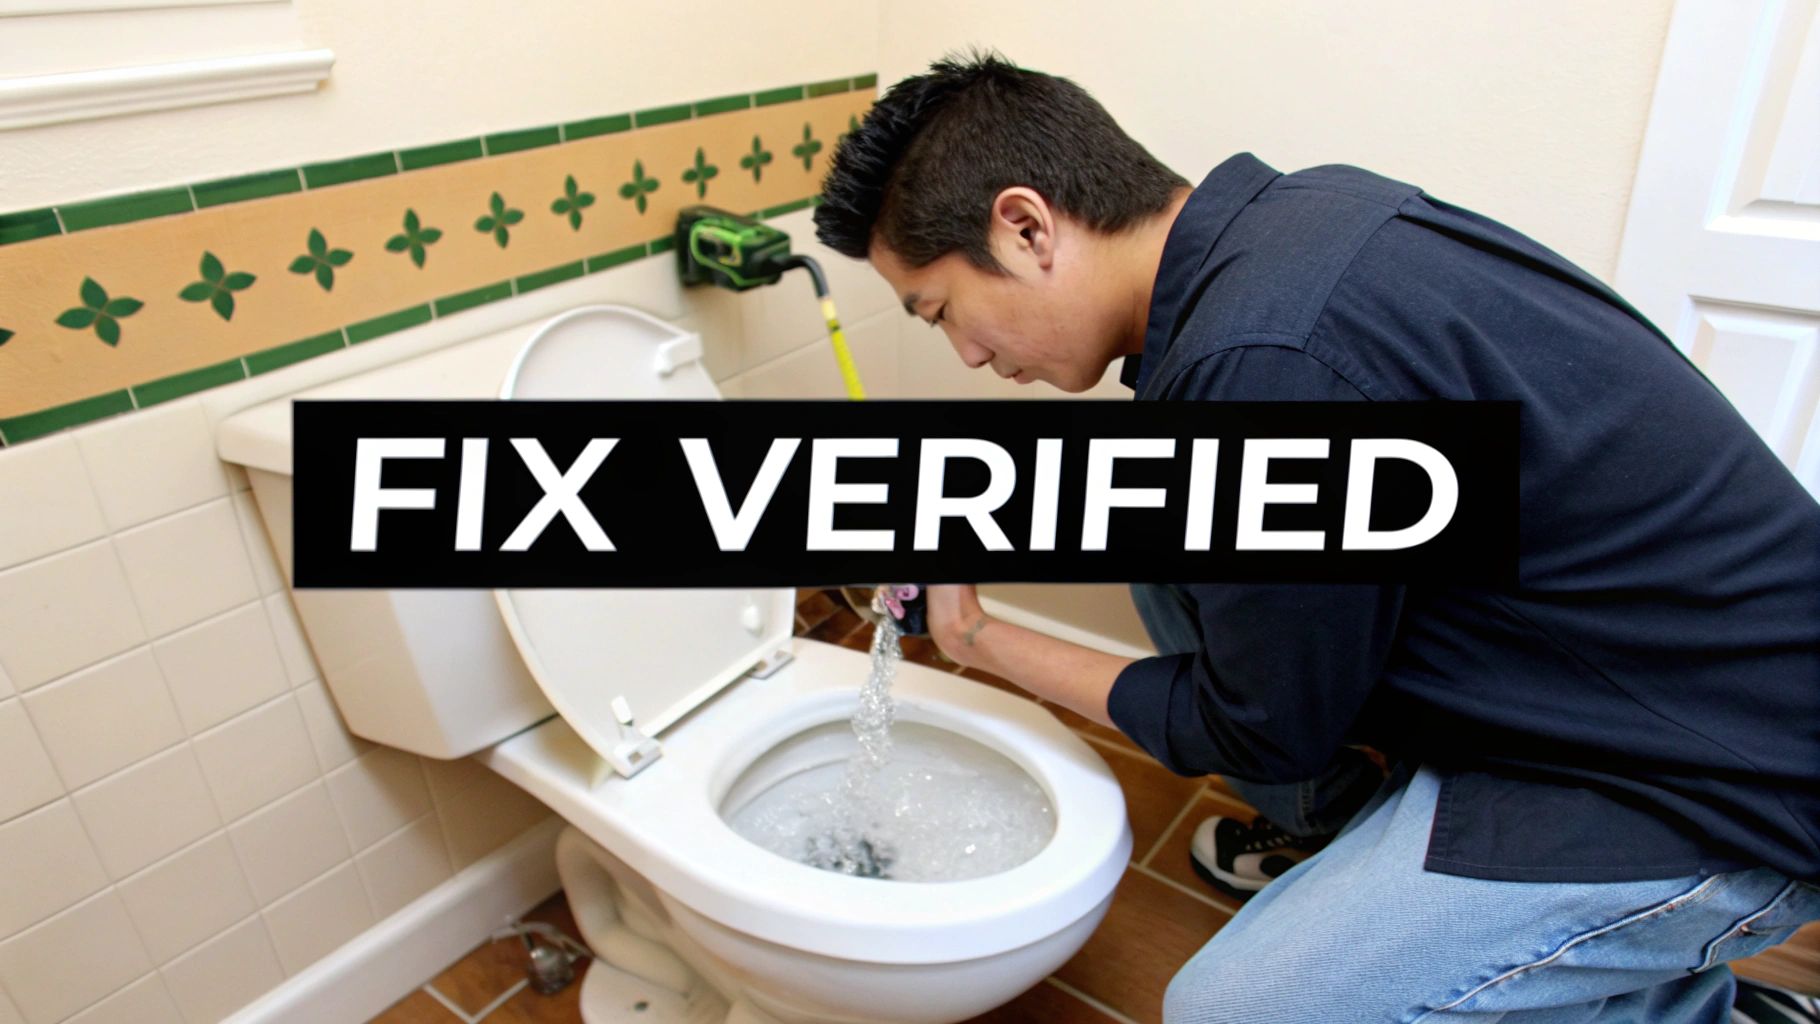
Test the Repair: Flush a few times to verify the leak is gone and the flapper seals properly.
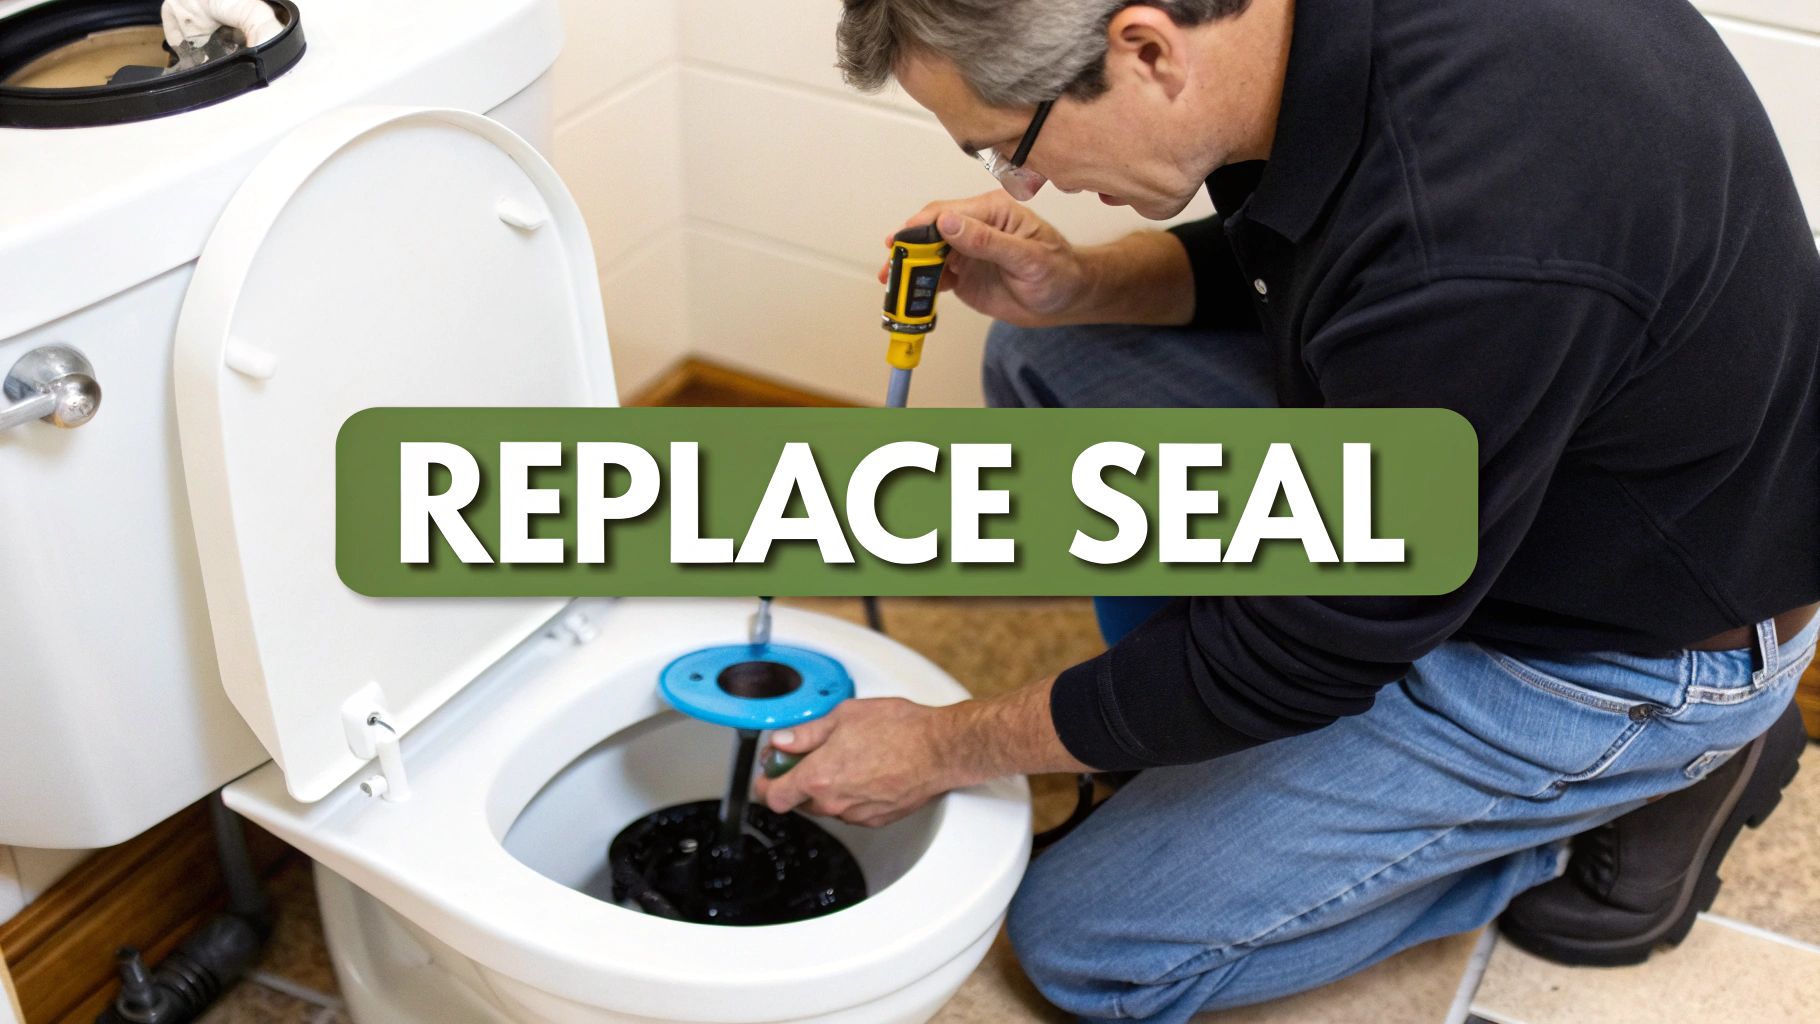
Addressing Tank-to-Bowl Seal Failures
A leak between the tank and bowl often indicates a worn tank-to-bowl gasket.
-
Empty the Tank and Bowl: Turn off the water, flush, and sponge out any remaining water.
-
Disconnect the Supply Line: Loosen the nut connecting the supply line to the tank's bottom.
-
Remove the Tank Bolts: Unscrew the bolts securing the tank to the bowl.
-
Replace the Gasket: Install the new gasket, ensuring proper placement.
-
Reassemble the Toilet: Place the tank back on the bowl, aligning the bolts and tightening them evenly. Secure the tank to the bowl with the bolts.
-
Reconnect the Supply Line: Tighten the supply line nut carefully.
-
Test for Leaks: Turn on the water and check for leaks at the tank's base and the supply line connection.
Installing a New Fill Valve
The fill valve controls the tank's refilling after each flush. A faulty one can cause continuous running or inefficient filling.
-
Prepare the Tank: Turn off the water and empty the tank.
-
Disconnect the Supply Line: Detach the supply line from the fill valve.
-
Remove the Retaining Nut: Loosen the nut holding the fill valve.
-
Install the New Fill Valve: Insert the new fill valve and secure it with the nut.
-
Connect the Supply Line: Reattach the supply line.
-
Adjust the Water Level: Use the adjustment screw to set the water level about ½ to 1 inch below the overflow tube. Refer to the manufacturer's instructions.
-
Test the Fill Valve: Turn on the water and observe the tank filling, checking for unusual sounds or leaks.
Fixing Those Dreaded Base Leaks
Water around the toilet's base signals a wax ring or closet flange problem. This is a more complex repair.
-
Turn Off the Water Supply and Empty the Toilet: Follow the same initial steps.
-
Remove the Toilet: Unscrew the floor bolts and carefully lift the toilet away.
-
Inspect and Replace the Wax Ring: Remove the old wax ring from the closet flange and install a new one.
-
Reinstall the Toilet: Align the toilet over the flange, press down firmly to compress the wax ring, and tighten the bolts evenly.
-
Reconnect the Supply Line: Attach the supply line and turn the water back on.
-
Check for Leaks: Carefully inspect the base for any leaks.
Testing Your Work: The Professional Touch
Thorough testing ensures a successful repair.
-
Observe for Leaks: Look for any visible water.
-
Listen for Running Water: Continuous running indicates a remaining issue.
-
Check the Water Level: Ensure the tank's water level is correct.
-
Perform a Dye Test: Use food coloring to confirm the tank-to-bowl seal.
Toilet Repair Parts Comparison
To help you choose the right parts, this table compares different replacement options.
| Part Type | Material Options | Typical Lifespan | Average Cost | Ease of Installation |
|---|---|---|---|---|
| Flapper | Rubber, Silicone | 2-5 years | $5-$15 | Easy |
| Fill Valve | Plastic, Brass | 5-10 years | $10-$30 | Easy to Moderate |
| Wax Ring | Wax, Foam | 5-10 years | $5-$10 | Moderate |
By following these steps and testing thoroughly, you can fix many common leaks. If you're uncertain, consult a qualified plumber, such as Essential Plumbing and Electric, serving Maryland homeowners. They can offer expert advice and handle complex plumbing issues.
When DIY Won't Cut It: Recognizing Professional Territory
While many toilet leaks are simple enough to fix yourself, some situations demand a licensed plumber's expertise. Knowing when to call in a professional can protect you from costly water damage and prevent future plumbing problems. This section, based on conversations with master plumbers, will help you identify the warning signs that your leak is beyond DIY repair.
Signs You Need a Professional Plumber
Certain symptoms indicate a problem more serious than a simple faulty flapper or fill valve. For instance, consistently pooling water around the toilet's base, even after tightening the bolts, might signal a cracked toilet base or a damaged closet flange. This requires professional attention. Similarly, multiple simultaneous leaks or recurring leaks in different toilet parts could point to a larger, underlying issue within your plumbing system. A qualified plumber has the expertise to diagnose and resolve these more complex problems.
Another critical indicator is the presence of sewer gas. A foul odor coming from your toilet could signify a sewer line problem. This is not a DIY fix and requires immediate professional intervention. Likewise, frequent toilet backups or slow draining could be a sign of a blockage in the main sewer line. These issues require a plumber’s specialized tools and knowledge.
Questions to Ask Before Hiring a Plumber
Before hiring a plumber, asking a few key questions is always a good idea. Inquire about their licensing and insurance to ensure they are qualified and protected. Checking online reviews and requesting references can provide valuable insights into their reputation and work quality. Discussing pricing upfront and getting a written estimate is also crucial to avoid unexpected costs. A reputable plumber will be transparent about their fees and willing to answer any questions you may have. Obtaining multiple estimates for comparison is always recommended. Finally, don’t hesitate to ask about their specific experience with leaking toilet repairs. These conversations offer important information about the plumber’s professionalism and expertise.
Cost Expectations and Minimizing Damage
The cost of professional toilet repair varies depending on the problem’s complexity. Simple fixes, like replacing a flapper, typically cost less than more involved repairs, such as replacing a closet flange or addressing sewer line problems. However, delaying professional help for a serious issue can lead to significantly higher costs due to water damage. For example, household leaks, including those from toilets, account for nearly 1 trillion gallons of wasted water annually in the U.S. Understanding the potential for this large-scale waste highlights the importance of addressing leaks promptly. Learn more about the impact of leaks here.
While waiting for a plumber, you can take steps to minimize damage. First, turn off the toilet's water supply to stop further leaking. Place towels around the toilet’s base to absorb any standing water and protect your flooring. If possible, open a window to ventilate the bathroom and reduce humidity, which can worsen water damage. These simple steps can help contain the problem and prevent additional complications until the plumber arrives.
Never Fix That Toilet Again: Preventative Strategies That Work
A newly repaired toilet brings a welcome sense of relief. But wouldn't it be even better to avoid the problem in the first place? This section explores preventative maintenance strategies to keep your toilet functioning smoothly and prevent future leaks. By implementing these practices, you'll save water and money, and enjoy the peace of mind that comes with a well-maintained plumbing system.
Simple Maintenance Checks: Five Minutes to a Leak-Free Future
Regular maintenance is the key to leak prevention. Integrating a few simple checks into your routine can identify potential issues before they become major problems. For instance, periodically inspect the flapper for wear and tear. A worn flapper is a common culprit for leaks, and replacing it is a quick fix. Checking the water level in the tank is another easy step. Ensure it's neither too high nor too low, preventing overflows or inefficient flushing. Lastly, listen for any unusual sounds like hissing or trickling, which can indicate a developing leak. These simple checks, taking only minutes, can prevent significant headaches down the line.
Cleaning Practices: Extending Component Lifespan
Proper cleaning practices contribute significantly to the longevity of your toilet components. Harsh chemicals can damage rubber seals and other parts, leading to premature failure and leaks. Instead, choose gentler cleaning solutions designed specifically for toilets. Regular cleaning of the tank and bowl removes mineral deposits and build-up, ensuring efficient function and extending the life of your toilet.
The Importance of Water Quality: A Hidden Factor
Water quality plays a significant role in the lifespan of your toilet’s components. Hard water, with its high mineral content, can cause build-up and corrosion, particularly in the fill valve and other internal parts. If you have hard water, consider a water softener or use descaling tablets regularly to minimize mineral deposits. This preventative measure can substantially prolong the life of your toilet parts and prevent future leaks.
Modern Toilet Technologies: Embracing Reliability and Efficiency
If you're considering an upgrade, modern toilet technologies offer substantial advancements in reliability and water efficiency. Dual-flush toilets provide the option of a full flush for solid waste and a reduced flush for liquid waste, saving significant water over time. Some models even incorporate advanced flushing systems that reduce clogs and enhance overall performance. While an upgrade represents an initial investment, the long-term savings on water bills and the reduced risk of leaks can make it a worthwhile expense. Advanced technologies like toilet leak sensors also address this issue. A case study involving a housing company in Denmark found that sensor installations identified leaks as high as 17%, highlighting their effectiveness in minimizing water waste. Learn more about the impact of leak sensors here.
Early Warning Systems: Protecting Your Home and Your Wallet
Consider installing a toilet leak sensor. These affordable devices detect even minor leaks, alerting you before they escalate into major problems. This early warning allows for swift action, minimizing water damage and saving you from costly repairs. Leak sensors provide a simple yet effective way to protect your home and your budget.
For all your plumbing needs, from routine maintenance to emergency repairs, trust the experts at Essential Plumbing and Electric. Serving Maryland homeowners, we're dedicated to providing top-quality service and ensuring your plumbing system operates efficiently.


0 Comments